- Find level profiles
- Edit the Conserv Default level profile
- Create a new level profile
- Assign level profiles
- View level profile history
Find level profiles
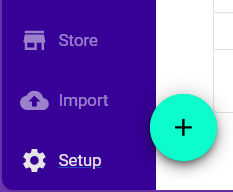
Click the white gear icon at the bottom of your left purple navigation bar. This will take you to the levels page, where you can create/edit your level profiles.
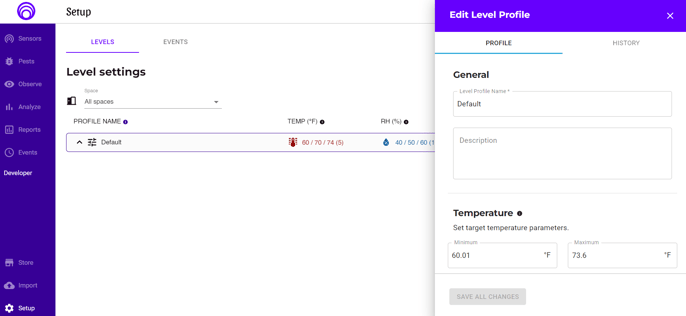
If it's your first time visiting this page, you'll notice there is a "Conserv Default" profile, which shows our recommendations pulled from professional sources. You can edit this profile if you'd like, or you can create a new one.
Edit the Conserv Default level profile
Simply click the profile name. The editing drawer will appear from the right side of the page, and you can edit the level profile as you'd like. Be aware that this level profile is automatically assigned to all of your locations and spaces until you change them!
Create a new level profile
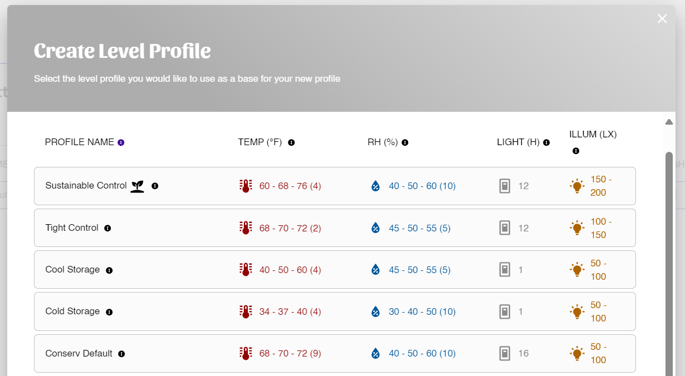
Click the purple "NEW LEVEL" button on the top right of the page, and you'll be shown a list of templates to choose from. There are six pre-made templates listed here that were created based on expert recommendations: Sustainable Control, Tight Control, Cool Storage, Cold Storage, and the Conserv Default. If you have made any other profiles before, they will show up here too.
Note: The Sustainable Control is a preset that uses the very flexible Bizot Green document (Sep 2023). Please note this is a wide range that is appropriate for collections that are not especially sensitive. "More sensitive objects will require specific and tighter RH control, depending on the materials, condition, and history of the work of art."
Once you've selected your preferred template, the new level drawer will appear on the right side of the page. You'll be asked to name your new profile, give it a description, and then set all of your ranges to your desired levels.
Assign level profiles
There are two ways to assign a level profile.
From the Sensors page
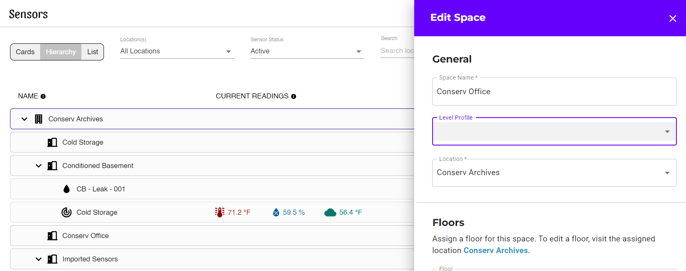
- Click the top Sensors icon on the top left of the left navigation panel.
- Click Hierarchy view.
- Find the Space to which you want to assign the level profile.
- Click the name of that space or location and use the dropdown menu in the editing drawer to pick the level profile you'd like to assign.
Note: Level profiles cannot be assigned on a sensor-per-sensor basis. Trying to edit level profiles from a sensor settings drawer will not work.
Tip
We recommend changing level profiles from the Hierarchy view rather than the Cards or List view. This is because the profile chosen for a Location or Space will affect every single sensor inside that location or space. Editing from the Hierarchy view will allow you to make sure you are applying the correct level profiles to the correct areas.
From the Level Settings page
- Click the gear icon on the bottom of the left navigation pane.
- Drag and drop the Space into the correct level setting.
View level profile history
Click the name of any level profile, and the level editing drawer will appear on the right side of the page. At the top, you'll see a tab that says "History." Click that tab, and you'll be shown a complete history of all the updates that have been made to that level profile.
Watch a Video on Setting Up Levels