Edit Team Settings
This article provides all of the necessary steps to manage your team members in Conserv Cloud.
Table of Contents
- Keeping Your Conserv Cloud Account Safe
- Change your Email
- Invite New Users to your Team
- Edit Member Details and Manage User Roles
- Deactivate a Member’s Account
- Add a Temporary User
- Assign a New Admin
- Admin vs. User capabilities
Keeping Your Conserv Cloud Account Safe
For security purposes, the Conserv Support Team will not
- Add or remove users to any Conserv Cloud account without express permission of the admin of the account.
- Change a user to an admin without express permission of an admin of the account.
Any admin in the Conserv Cloud account can add/remove users or change user/admin permissions.
If the main and only admin in the account has already left the institution, please contact the Conserv Support Team, which will verify your identity before granting access to the account.
Change your Email
If your institution changes domains or if your main email has changed, any admin in the Conserv Cloud account can make the update.
- Invite your new email as if you were a new user to the team. See instructions below on how to send invitations.
- Once you have accepted the invitation through your new email, Deactivate your old email account using the instructions below.
Invite New Users to your Team
Conserv has no limits on the number of users you can invite to your team account even without a subscription. You may also have more than one admin per account.
Conserv recommends that you invite everyone on your team to Conserv Cloud. Creating better collection environments is a collaborative effort between collections, facilities, administration, and volunteers.
Tip
Before you begin: Notify team members that they will receive an invitation from team@conserv.io in case they need to check their spam folders for the invite.
- Sign in to Conserv Cloud.
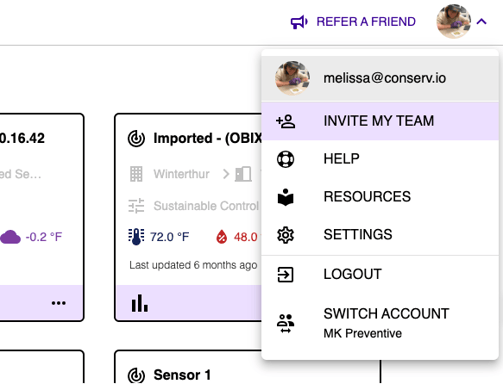
- In the upper-right corner of the page, click the user menu.
- Click INVITE MY TEAM.

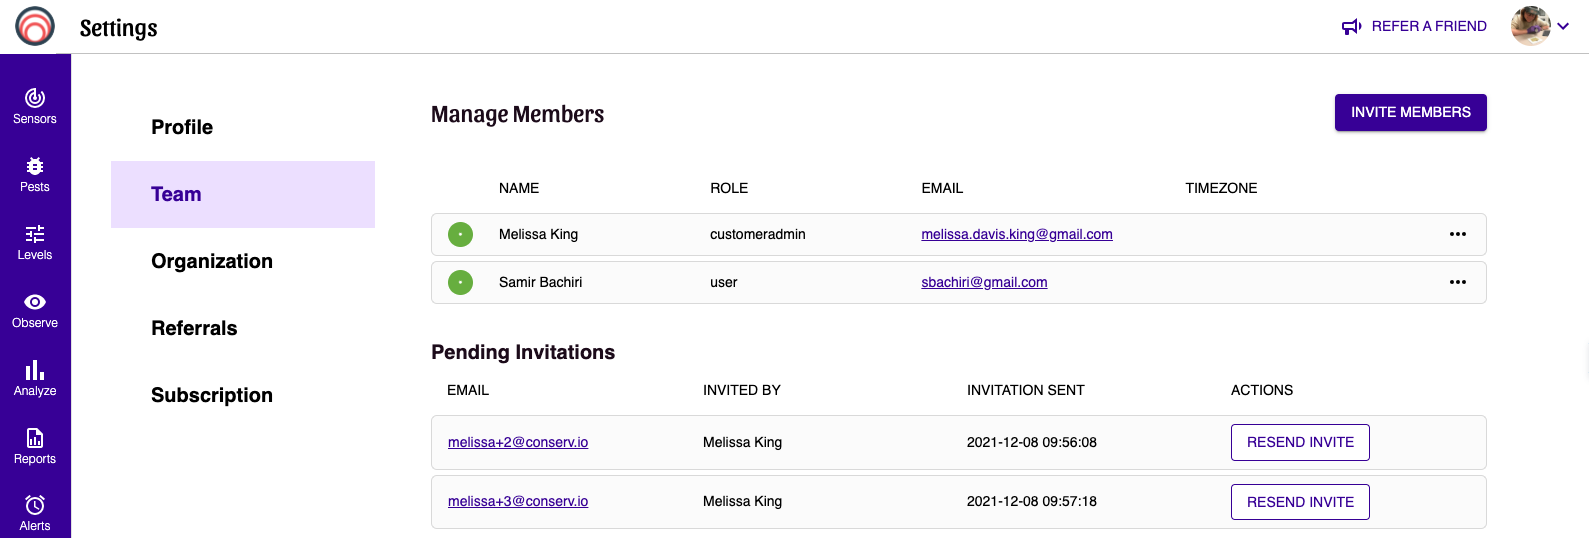
- Click INVITE MEMBERS.
- Enter the team member’s email address (all lower-case), and click INVITE TO CONSERV!
An email is sent to the new member, where they can click Accept Invitation to join the team account. - Track pending invitations, and click RESEND INVITE if necessary.

Edit Member Details and Manage User Roles
Admins can modify user roles and personal details for each member. If you belong to a different department, such as purchasing or administration, and will not be the primary user of Conserv Cloud, you can assign the necessary permissions to your main users. There is no limit to the number of admins you can designate.
- Sign in to Conserv Cloud.
- In the upper-right corner of the page, click the user menu.
- Click SETTINGS, and select the Team tab in the left menu.
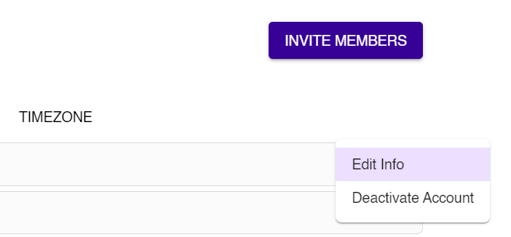
- Click the three-dot menu, and select Edit Info.

- Edit a member’s personal details.
- First name
- Last name
- Email address
- Date of birth
- Timezone
- Select a member’s user role. (Read-only users are not currently supported. If you would like this feature, request it here.)
- Admin
- User
7. Click SAVE.

Deactivate a Member’s Account
- Sign in to Conserv Cloud.
- In the upper-right corner of the page, click the user menu.
- Click SETTINGS, and select the Team tab in the left menu.
- Click the three-dot menu, and select Deactivate Account.
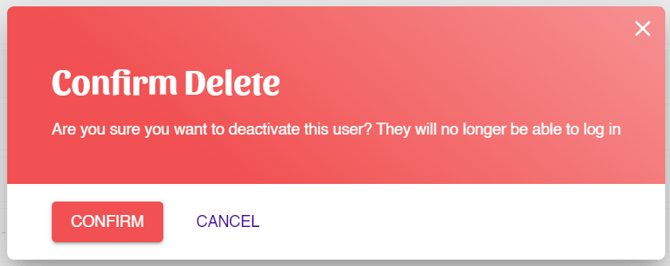
- Click CONFIRM in the dialog. The deactivated member will no longer have access to your account.

Add a Temporary User
Temporary users may be useful when you have contractors, interns, loan officers, or other users who require only temporary access to your data.
- Invite the user as you would any other permanent user.
- Ensure that you set an appropriate user role. Generally, it is not advisable to grant admin access to someone who will not be with your organization for long.
When your temporary user leaves your organization, deactivate their account.
Assign a New Admin
If the person who managed your institutional Conserv Cloud subscription is leaving, follow these steps to ensure a smooth transition to avoid potential issues:
- Before the admin leaves, ensure that they assign someone else the admin role. This prevents you from being locked out of the account. If this was not done, open a support ticket, and the Support Team will help you resolve it.
Notify Conserv of the new Point of Contact for your organization. They serve as the primary admin and will be the main individual Conserv contacts for account-related issues or troubleshooting matters.
Admin vs. User capabilities
Assign admin or user roles to your account members based on what each person to do. The x indicates ability to perform the task.
| Capabilities | Admins | Users |
| Invite members | x | x |
| Change organization account profile details | x | |
| Manage team member roles | x | |
| Create new events | x | |
| Delete events | x | |
| Turn events on or off (Tracked or Not Tracked) | x | |
| Create new level settings | x | x |
| Set or change level settings | x | x |
| Add image to sensors | x | x |
| Delete image from sensors | x | |
| Move, merge and delete sensors | x | x |
| Create new locations and spaces, edit hierarchies | x | x |
| Import or export data / add new imported sensors | x | x |
| Delete sensors | x | x |
| Write observations in graphs or event history | x | x |
| Create reports | x | x |
| Edit pest monitor hierarchies, create new pest monitors and move them around | x | x |
| Edit custom pest list | x | x |