There are several ways to move sensors to different spaces/locations.
Move sensors around using the sensor menu
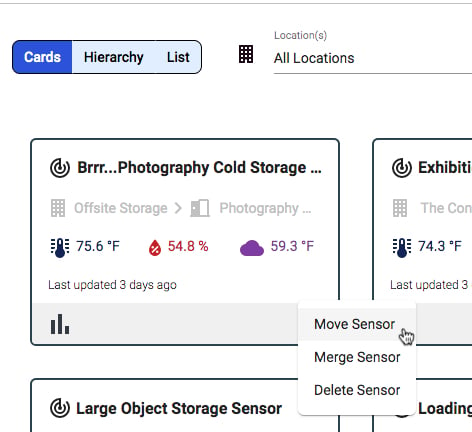
From the Card view, find the sensor card you wish to move, and click the three dots in the bottom right corner of that card. Select "Move Sensor" from the dropdown menu.
From the Hierarchy or List view, find the sensor you wish to move, follow the row to the far right, and click the three dots. Select "Move Sensor" from the dropdown menu.
Move sensors using the drag and drop feature
The easiest way to move your sensors to new locations or spaces is by using the drag and drop feature in the Hierarchy view. Find the sensor you wish to move using the dropdown lists of locations and spaces. When you've located the sensor, click its row and drag the row into the dropdown list of the new location/space.
View Sensor Movement History

- Sign in to Conserv Cloud.
- Click Sensors in the left navigation menu.
- Select the Cards view. You can do this from any view, but we use Cards in this example.
- Click the name of the sensor whose history you want to see.
- In the Edit Sensor drawer that opens up automatically on the right, click the HISTORY tab